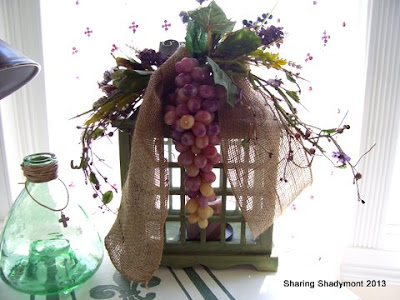
I'm not ready to go all out for Fall, just yet, but it's getting harder and harder not to bring out all the oranges and rusts. I finally gave in, somewhat, and made a spray for the green lantern/ bird cage in the sun room. Since the colors in there are green, white, and pink, I chose plum colors for the spray.
Here is the lantern without anything attached to it.
 I dug through some of my bins in the basement, and found a few scraps of faux florals that were deep plum in color. I fastened them together with metal and plastic ties.


Once the spray was attached, it was easy to bend the vine the way I wanted it.

 I think the colors and burlap give a subtle hint of Fall, without going all out with the oranges and rusts. In addition, it blends in with the greens and pinks in the room.
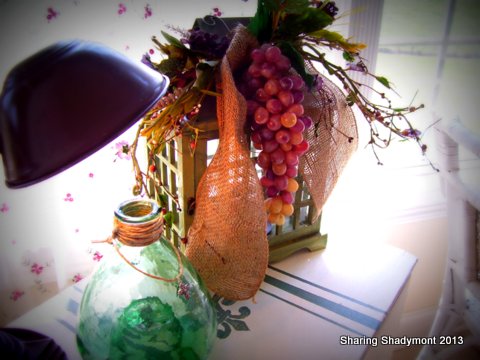
The inside holds a brown candle that smells delicious! If I can find a string of white lights in all my bins, I am going to place those inside the lantern. Maybe this will suffice until Autumn really arrives, and the pumpkins and leaves can be displayed. Are you ready for the deeper hues of Fall?
Here is the lantern without anything attached to it.


The spray consists of a piece of vine with small lavender flowers which I cut into 4 pieces to make it shorter and easier to work with. Then I had two small sprays with the berries, and the deep lilac looking flowers, and one huge bunch of grapes. Once I got everything tied together, I attached it to the handle of the lantern with the burlap ribbon without tying a bow.

Once the spray was attached, it was easy to bend the vine the way I wanted it.


The inside holds a brown candle that smells delicious! If I can find a string of white lights in all my bins, I am going to place those inside the lantern. Maybe this will suffice until Autumn really arrives, and the pumpkins and leaves can be displayed. Are you ready for the deeper hues of Fall?
Sharing at:
Hi Kathy... I popped over from Debra's party... I just love your Autumn lantern!... what a fabulous job you did on it... and the colors are so pretty... yes, I am totally ready for Autumn!... I have already begun to decorate for my favorite time of year... love the beautiful Fall hues most of all... xoxo Julie Marie
ReplyDeleteHi Kathy! You're too much! This is so gorgeous! I love the floral you made and it looks so beautiful on that lantern! Now come on over and help me get into the mood of fall! :)
ReplyDeleteBe a sweetie,
Shelia :)
So pretty! I love the colors :)
ReplyDeleteSusan
Absolutely beautiful.
ReplyDeleteEnjoy your weekend.