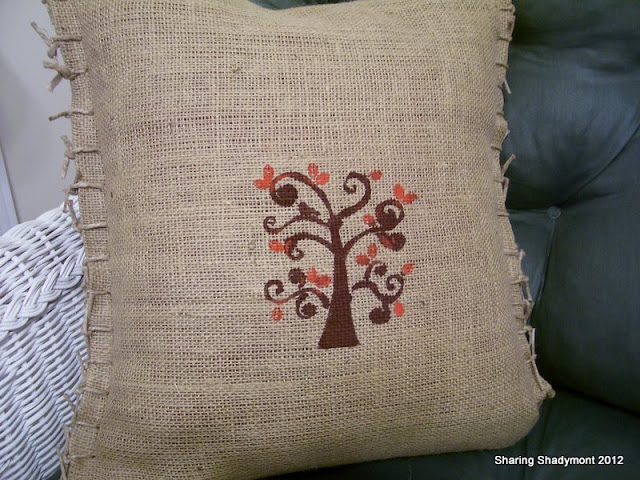
I just have to share my no sew pillow project. I had some burlap fabric in my fabric stash, and decided I would use it to cover a pillow. First, I found an old pillow I no longer use. I spread the burlap out on the floor and laid my pillow on it so I could cut the fabric big enough to cover it.
I was so intent on the project, I didn't make any pictures of the process.
Once the burlap was cut, I folded in the sides about an inch, and glued it down with Tacky Glue, pressing it down several times with my fingers. I did this all the way around the fabric, and laid it aside to dry over night. The Tacky Glue dries clear.
My next step was to determine how I could lap the fabric over the cushion in an envelope fashion. I had tried to get my computer to print out a graphic that would show up on the burlap, but printer problems interfered with that plan, so I found the center, and stenciled it with the tree stencil I bought at Michael's.
The final step was to fasten the burlap around the pillow which I did by punching a small hole through all the layers, inserting jute twine through it every couple inches and tying it.
Here's how the back of the cover looks.
If I choose to, I can easily take this apart, press it, and have a table runner.
This was a fun project with no sewing required, even though that probably would have been less time consuming. It fits in well with my fall decor.
I had everything used for this project, and didn't spend a penny!
I had everything used for this project, and didn't spend a penny!
Please visit these parties:


That is brilliant! Love the way you tied the edges with twine and the stenciling is perfect for Fall.
ReplyDeleteThanks for the tutorial.
Babs
I love this project! Very nice for fall decorating. Enjoy your day. Mildred
ReplyDeleteYou had me at no sew!!! :-)
ReplyDeleteToo cute.
Cheers, Gee
Great look! I love the hand stitched look of it and the stencil you did on it! I saw a very high end furniture co. display a chair with big stitches showing on the trim... I'll have to look for it.
ReplyDeleteYour pillow is lovely and you did such a nice job! Great inspiration! Thank you for sharing your project at Potpourri Friday!
ReplyDeleteI love that pillow - it looks awesome! I think I adore it for its non-fussy simplicity- really well done!
ReplyDeleteThat's really nice! I love how you did the edges!! ~Deanna
ReplyDeleteHi Kathy, your pillow turned out great. I love the stencil you used and how you tied it together with twine. I'm a big fan of fabric glue, too!
ReplyDeleteYour pillow is beautiful!! I have so enjoyed looking at all of your fall decor. Everything is gorgeous! :)
ReplyDeleteOh, my gosh! That is so pretty! For a second there, it looked as if you embroidered that...
ReplyDeleteIt's awesome!
Tying with the jute is absolutely darling! I think the stencil was the way to go. If you do get to trying the transfer to burlap from your printer, I'd love to hear how you did it and if you used some sort of iron on transfer or what, and if you liked the results. I've wanted to try it, but would like the easiest most foolproof and lasting way that isn't a stencil, because they don't make stencils of all the things I'd like to put on burlap!
ReplyDeleteLiz
Now that turned out cute. I love how you finished the edge!
ReplyDeleteOh, your stenciled pillow came out wonderful! the perfect touch of color on the burlap. Thank you for joining TTF this week. Have a fantastic weekend!
ReplyDeleteToo cute!
ReplyDeleteHow cute! I love the stenciled pillow. I have been wanting to do something with some burlap I have in my "stash". And thank you for stopping by. It is always a joy to hear from you. Hope you have a beautiful Autumn weekend. Hugs, Karie
ReplyDeleteYou did a great job on the pillow!! That is so creative! Hope you are having a great week!
ReplyDeleteWhat a great idea! It looks so nice!
ReplyDeleteI am a lover of burlap and the twine tied edges are fabulous! Thanks for sharing with Share Your Cup.
ReplyDeleteHugs,
Jann
I have been wanting to try this! SO cute! Thank you for joining HSH!
ReplyDeleteSherry
Office repainting services Surrey
ReplyDeletePort Moody commercial office painters